Chapter Three: The Press of Words (Linking Containers)
Life is good, Adventurer, life is good. Now that we've got a stateful database up and running, let's connect a bee log!
Bee log? What are you talk--wait a second, do you men a "blog?"
Yes Adventurer, that's what I said, a bee log.
No wait, that's not how you say it, it's a "blog." All together, like one word, "buh-log."
Haha Adventurer I knew it would be unfair to expect the might of Alauda, the cloud of all clouds, to run through your veins instantaneously, but I had hoped you would prove stronger than this!
Don't you know, a bee log is different from "a log." A log is what we looked at in Chapter 2 to find the default password for our mysql database. That's why we call the second type of log a "bee log." Duh.
But fine, if it makes it easier for you, I'm happy to call it "blog" from now on. Alana is a gracious creature after all...
Good grief.
By the end of this quest, Adventurer, you'll be able to:
- Link containers
- Run third party and custom containers on Alauda
- Have a fully functioning Wordpress site up
Let's get started. Login and do what comes naturally.

Ouch, giant walls of text hurt.
Oh hush, Adventurer, I know you've been through worse. Moving right along, you'll see there's a Wordpress container already in our gallery.

Importantly, this container already has a mysql database bundled with it. Since we want to demonstrate how to link containers in this tutorial we'll avoid using this one. Instead, you get to learn how to seamlessly use a third party container on Alauda! Aren't you the lucky one :)
Alana, a question. If we use the bundled container can we still make the database stateful?
Oh I love audience participation, shows they're really listening! Yes, yes you can.
So, we can get the stateful database, it'll already link to our Wordpress site, and it's all taken care of for us by Alauda...why are we doing this manually instead?
A good education is its own reward, dear Adventurer. Give a man a fish and all that. This way you'll be able to do whatever you want, fully taking advantage of the customizability Alauda offers. Of course the bundled options are there for when you just need to get something running quick too.
Let's see how to import a third party container. We want to use the official wordpress container located here: https://hub.docker.com/_/wordpress/.

After hitting Config Image we're greeted with the familiar Configure Your Service page.

Clicking through to Advanced Config we can establish an Endpoint exposing HTTP port 80. We also need to change the Environment Variables that get set when the container launches.

This is how we'll tell the Wordpress container where to find the database (remember oysterfeast?) that we setup in Chapter 2.
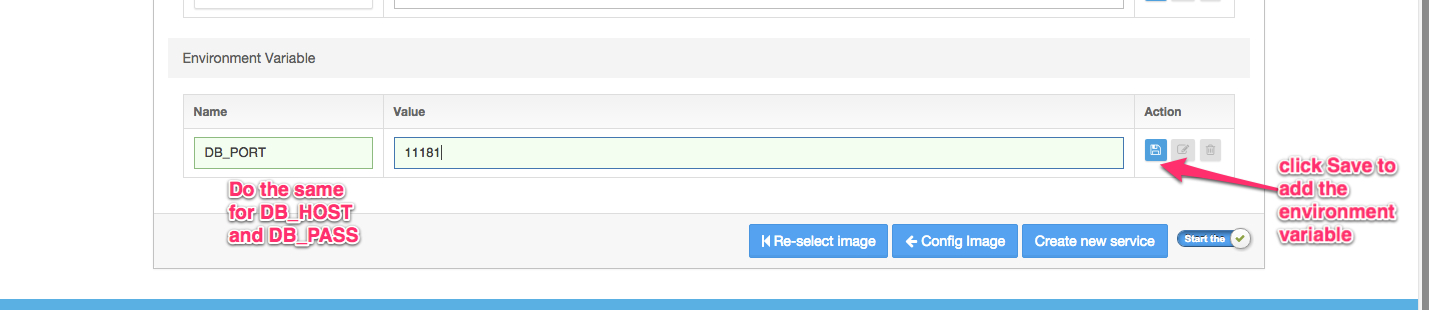
To figure out what to put in for DB_HOST, DB_PORT, and DB_PASS we'll need to look at the oysterfeast Service in detail.

From the Endpoints pane we can get a lot of what we need.

But not quite everything...clicking over to the Logs pane gives us the DB_PASS.

You'll note that my password is obscured :)
Returning to our "Configure Your Service" screen for the Wordpress container, we can now fill in those environment variables. Simply add each environment variable with the correct value.
After clicking Create we can grab the Endpoint URL and navigate to it in our browser of choice. Drumroll please...

And there you go, the Press of Words, linked to a mysql DB, running on Alauda. Well done, Adventurer!