Chapter Two: All Your (Data-)base Are Belong to...
Alright Recruit, listen up! It's time to get serious. It's time to get a database.
Want a refresher on databases? Keep reading. Already know what's up? Skip ahead - just look for the next horizontal line.
A database is where we put things. Simple as that. Got a new user for your website? Shove 'em in the database. Got a new item for your store? You get the idea...
Databases come in two main flavors. Relational and non-relational. You can read more about the differences here, where you'll even learn the name of E.F. Codd, the progenitor of the relational database model. (Boom, +5 to nerd-cred, just like that. You're welcome.)
For now we'll focus on the relational database. By the end of this exercise you'll
- have a MySQL database service up and running
- understand the difference between Stateful and Stateless Services
- and remotely connect to your MySQL instance.
Not too shabby, eh?
I hear you, Adventurer, I hear you. "You're so smart and svelte and well-feathered, Alana. I want to be like you when I grow up. But what does a database look like?"
What? Where did she even get that from? I mean, I know she's a mythical creature and all, but talk about self-involved...Still, I do want to know what a database looks like.
Ahah, I thought as much! Well, here's an example.
Can she hear my thoughts?
Only some of them. Now pay attention, here's the example.
| id | username | message |
|---|---|---|
| 1 | walrus | "The time has come to talk of many things" |
| 2 | carpenter | "Cut us another slice" |
This sample database is pretty simple. An id column lets us differentiate each row. Each row contains a username and a welcome message to be displayed when that user logs in (you'll notice we have no password field, for now let's assume this is a very simple website).
Of course we could have put anything we wanted in the database, for example inventory for a store (books with titles, authors, price, and number of copies remaining).
As users take actions on your website (purchasing a book) you can update the database (decrease the count of that title by 1) to keep track of what's going on.
That's it, databases in a (very small) nuthsell.
Huh, I didn't know Alana was a Lewis Carroll fan. I didn't even know they had Lewis Carroll up in Alauda...
Indeed they do, my featherless friend. Now, let's talk about a feature specific to Alauda.io - the difference between a "Stateful" and a "Stateless" service. We'll introduce this concept while we show you how to setup a Database Service in Alauda.io.
Let's get started by logging in. You'll be greeted with the familiar sight of your Services pane.

We'll go ahead and spin up a mysql container for our database service.
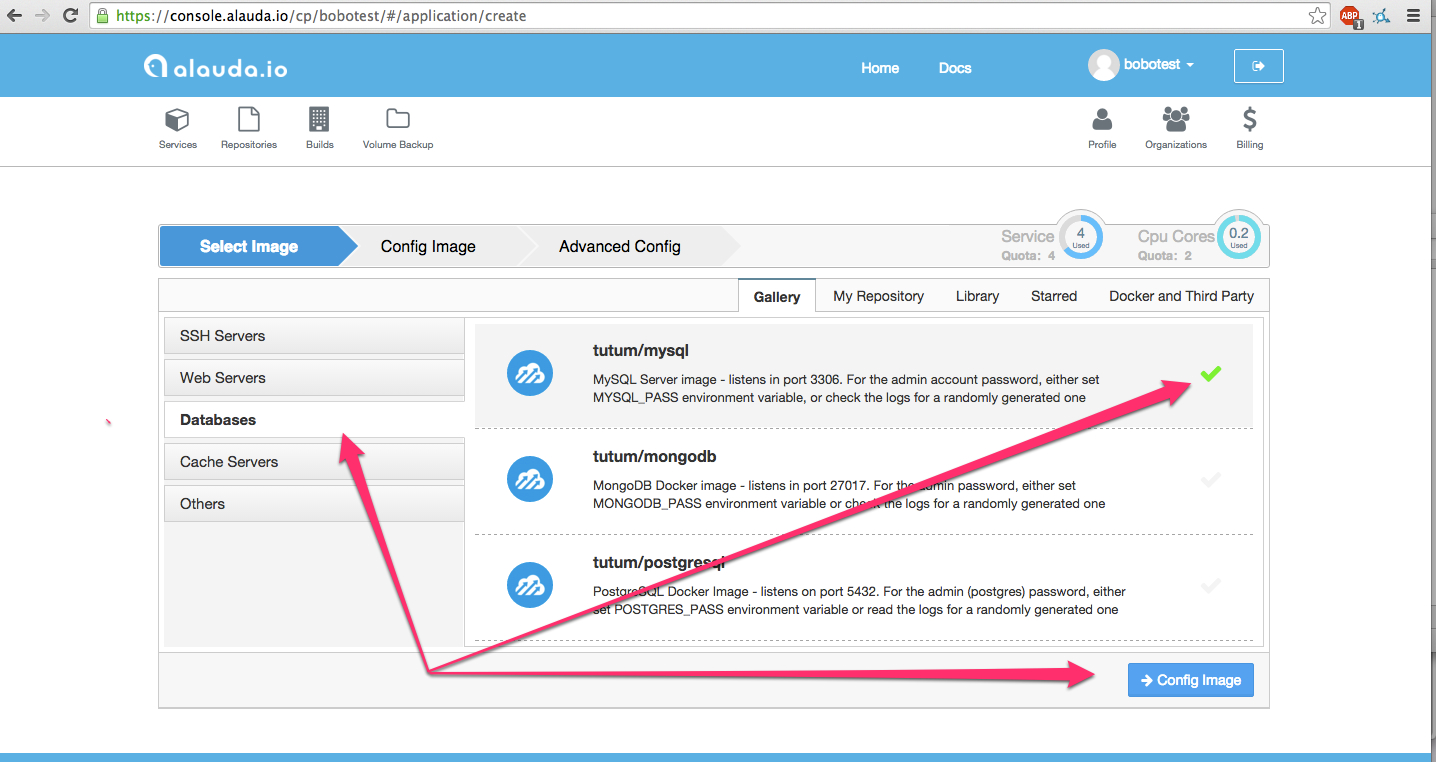
What, no snarky annotation on the screenshot? I thought that was Alana's signature move...
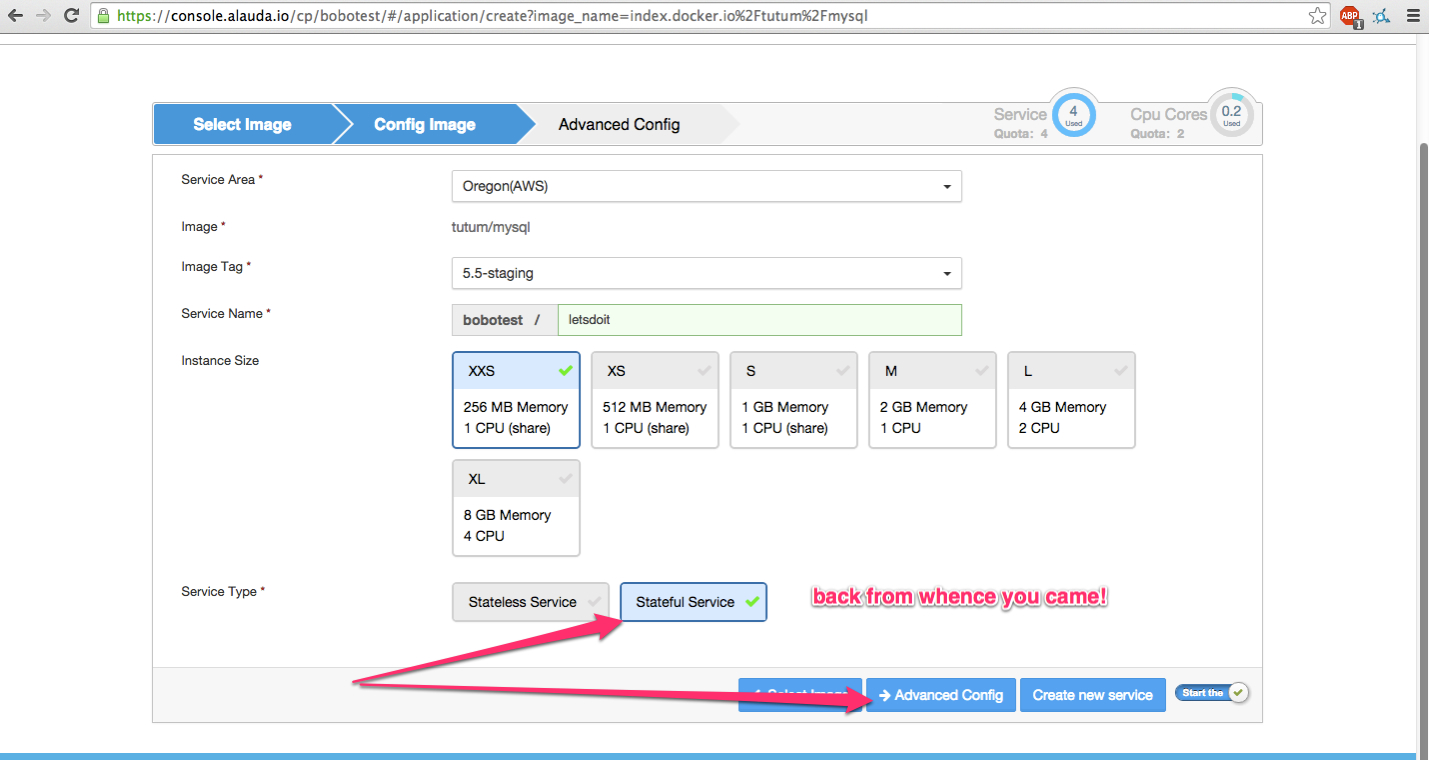
Don't be impatient Adventurer, pull from the same well too many times and the well runs dry. Click through and you'll be greeted with the configuration screen. Go ahead and click through to Advanced Config.
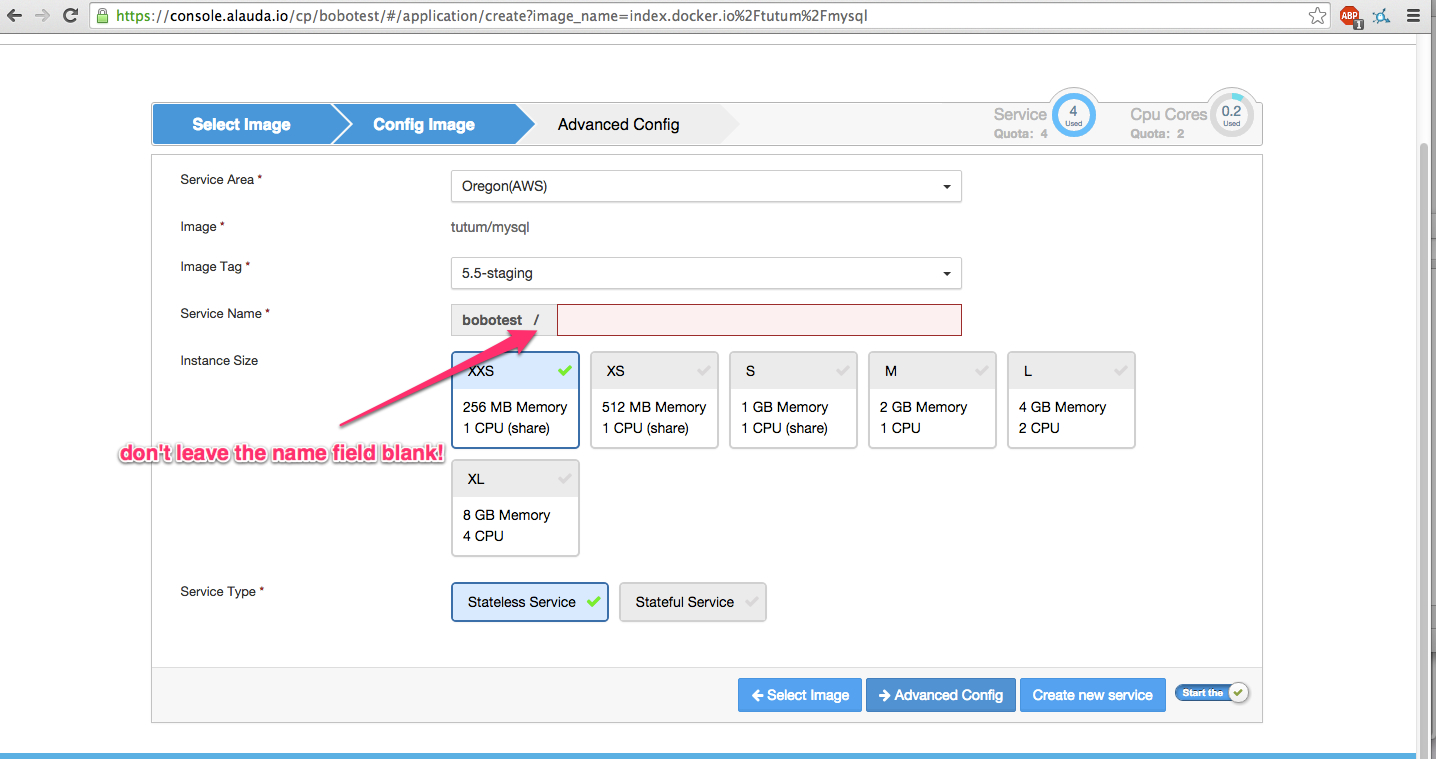
Hey did you leave the name field blank? I bet you left the name field blank!
No Alana, I didn't...
Aww, okay...Go ahead and click on Advanced Config then.
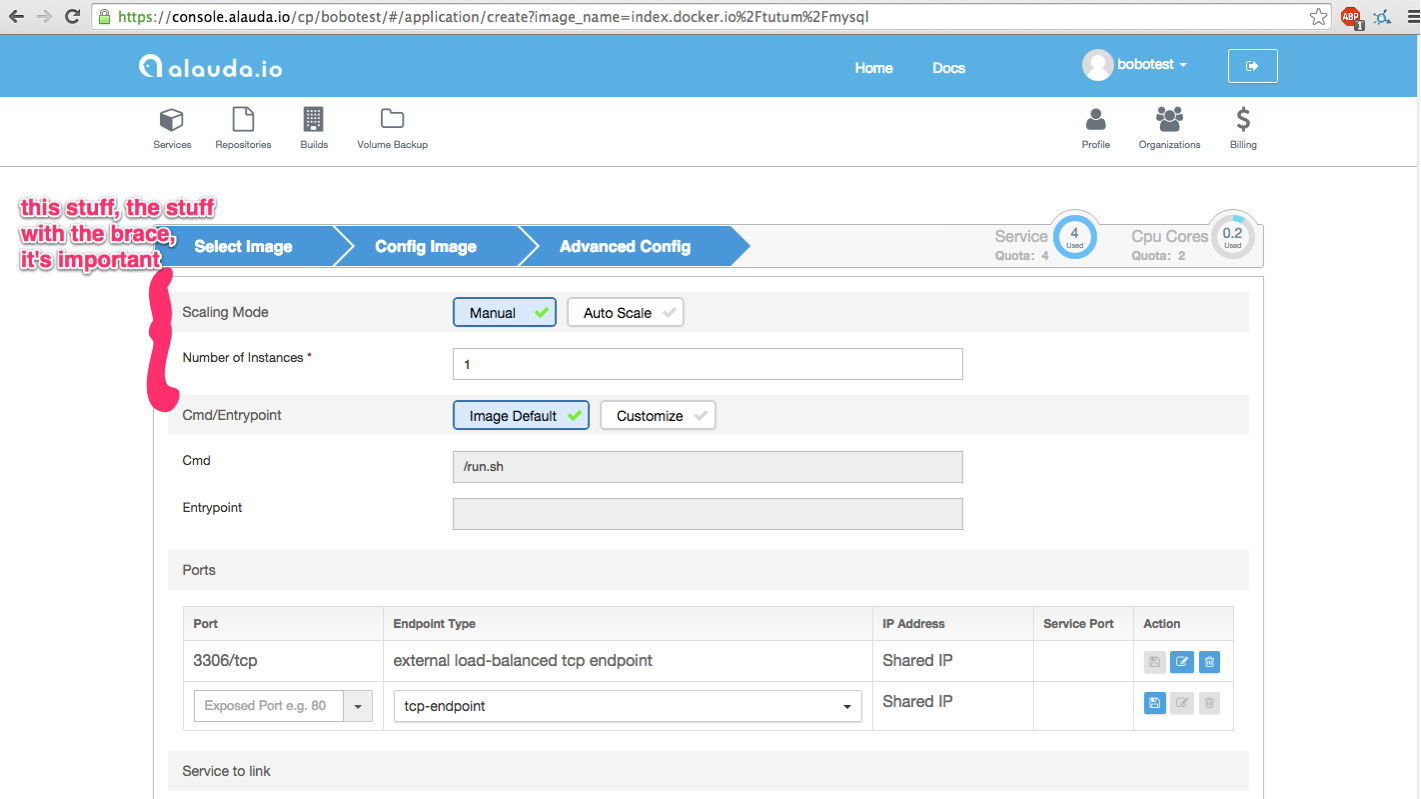
See that stuff with the brace (the important stuff)? Because we've selected a "Stateless" service (see previosu, non-brace screenshot), Alauda.io can handle the scaling for us automatically. Auto Scale means Alauda.io will automatically scale out the Service to more instances as needed. We can also choose how many instances we would like to start with.
By default the scaling option is set to "Manual," which means you, Adventurer, must adjust the number of instances upward or downward as you see fit.
But what if we want a Stateful service? After all, if our service is Stateless then whenever we stop the Container the state is lost. It wouldn't be very fun if our database forgot all the changes.
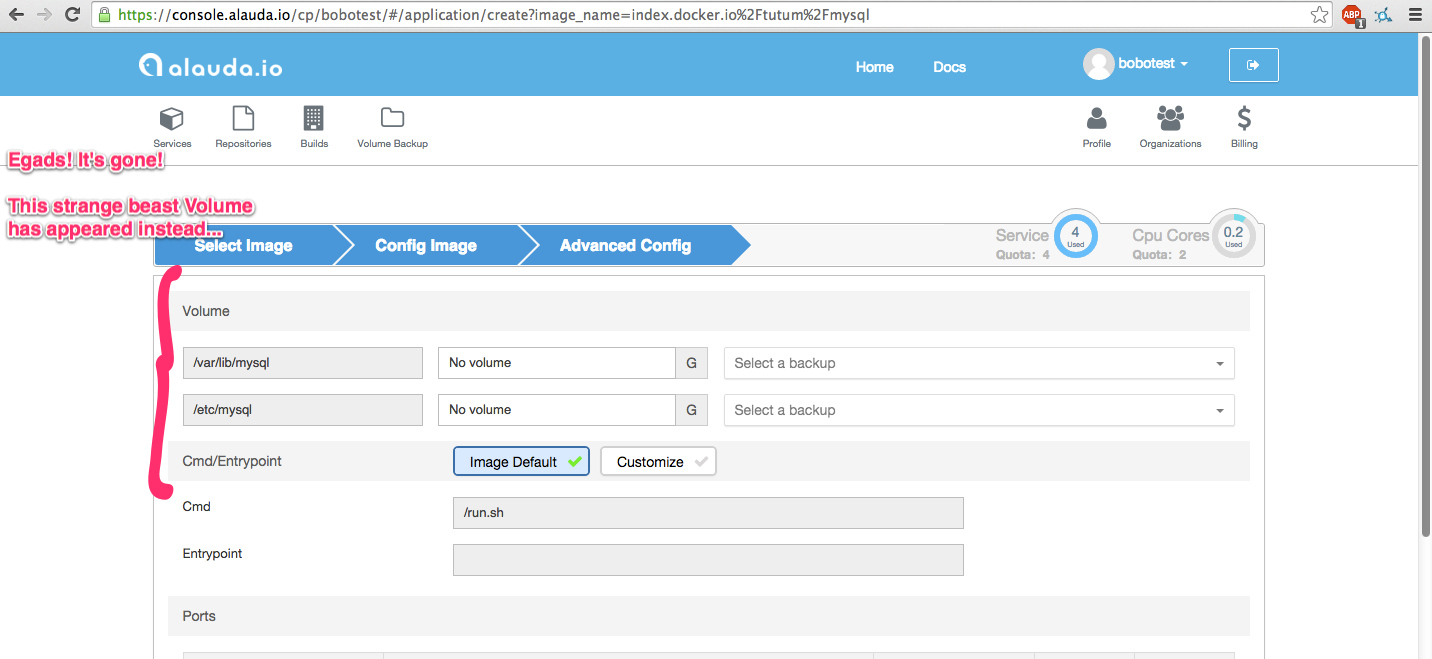
You'll notice that the Auto Scaling option is gone. With persistent storage application-level logic must specify how scaling is to occur, since Alauda, mighty though it is, would not know how you desired your service to be scaled, my dear Adventurer.
To get a Stateful service we must, of course, specify a storage Volume to hold the data for that service. Since we are using a mysql Container here, the default Volumes /var/lib/mysql and /etc/mysql have already been specified (you can see this in the Dockerfile).
The default (and minimum) storage volume size is 10GB, and for now we'll stick with that. Clicking on the value allows you to change it. Let's leave the /etc/mysql directory set to No volume, and choose 10GB for /var/lib/mysql. We don't need a volume for /etc/mysql since it just stores a mysql configuration file that won't be edited and comes with the container image already.
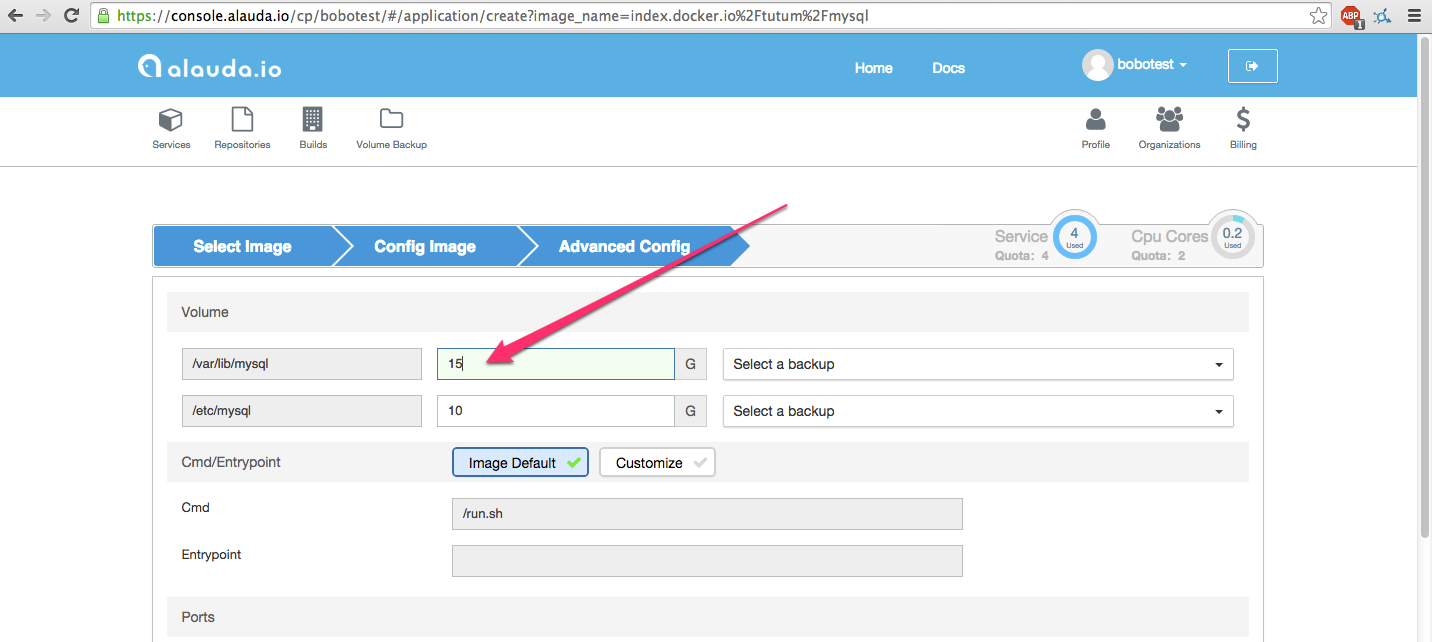
Why'd she show me a screenshot with 15 in it if she wants me to choose 10?
Adventurer, you can choose whatever size fits you best. I just wanted you to see that you can choose sizes that aren't in the drop down menu.
Oh...I see. I guess that does make sense.
Good, let's move on.
Excellent...

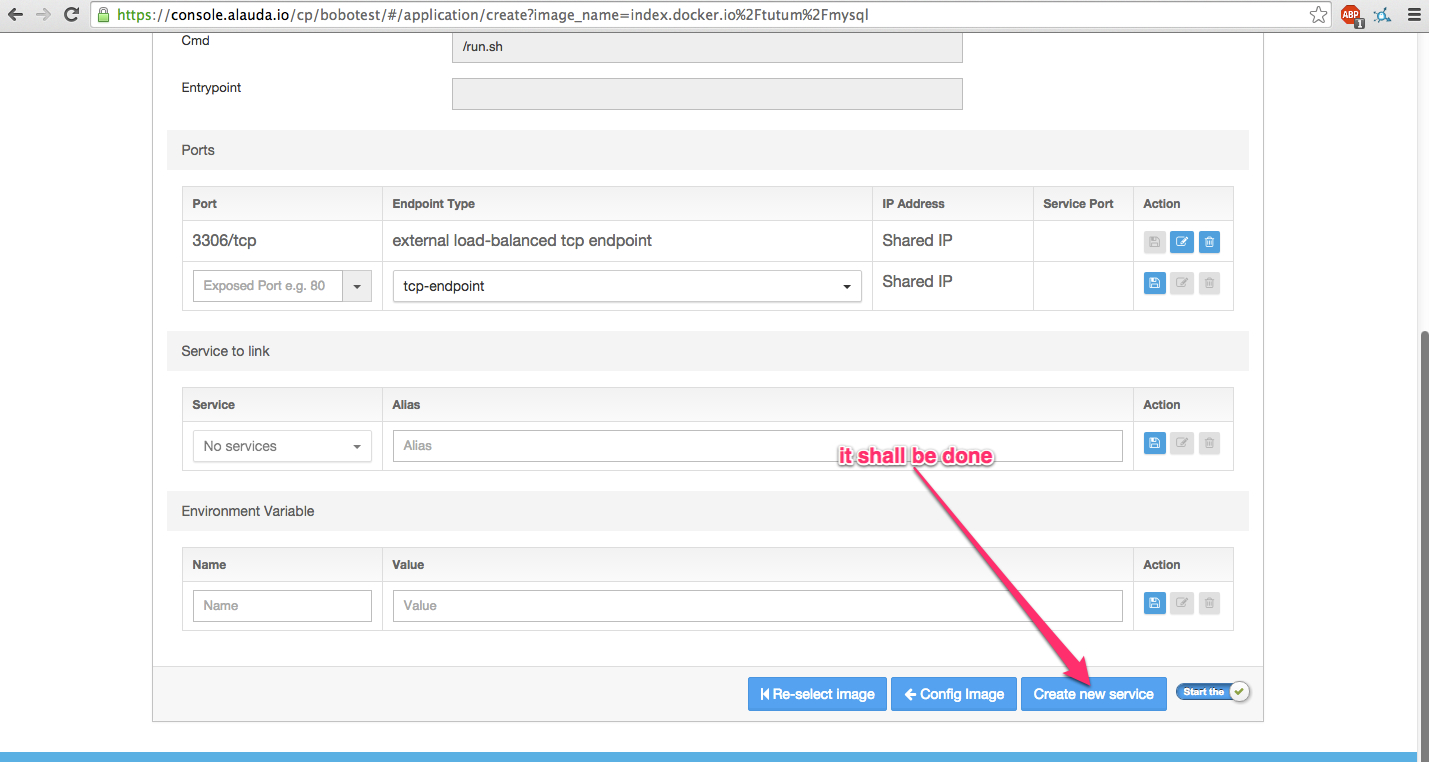
Congratulations, Adventurer, you did it! We have a Stateful mysql Database up and running. We can even connect to it from our own machine, but first a word on ports.
The Service Port is how to connect to the Service from outside the Container, a step we'll demonstrate shortly. The Port (3306) is the port the app inside of the Container will listen on, e.g., mysql will listen on port 3306.
To connect to the database we'll need to have mysql already installed. If you don't, don't worry about it. This is completely unnecessary to have your Database up and running on Alauda. It's just a fun little step to show you that the database really is there :)
If you have mysql, go ahead and type:
mysql -u admin -p -h dbase-bobotest.alauda.me -P 10381
Replace dbase-bobotest.alauda.me with your service's address and 10381 with your service's Service Port. Go ahead, type it in.
Adventurer dutifully does as Alana commands...and is greeted with...

Adventurer looks to Alana with hopeful eyes
Of course, of course, simply look to the Logs and your wish shall be granted.

Be careful - that first 'p' is not actually part of the password, it's just the command line way for specifying that the string following it is the password.

And there you have it, Adventurer, your very own database, up and running. Next time we'll connect a magical artifact known as the Press of Words (or "wordpress" in your common tongue) to our newly minted Database.